The Gentlemen's Bowtie FREE Knit Pattern
I have always struggled to find nice, trendy patterns for the grown men in my life. So when I saw that one of my sons had begun to wear bowties with his dress clothes, I thought to myself "I can make those!!" They are a quick gift to make up and with the Holiday Season upon us it is the PERFECT time to make them up for gifts!!

THE GENTLEMEN'S BOWTIE


The Gentlemen's Bowtie is knit in a tight linen stitch. The finished fabric resembles a nice
tweed. And because of this NO BLOCKING
is necessary!! Isn’t that GREAT!?!?

Remember....I am a human and sometimes make mistakes!!
If you find an error with my pattern, please let me know in the comment
section and I will try to correct it as soon as possible!!!
This is an Original Design by Amy B Stitched. Feel free
to make for profit, but remember to give credit to me, and link back to my
blog www.amysastitchatatime.blogspot.com
Thank
You!!! Amy B

SIZE: 4 ¼ inches x 1
½ inches
MATERIALS:
·
Sock or fingering weight yarn 45-50 yds
·
Size 2 needles (2.75 mm)
·
Yarn needle
·
Hand sewing needle
·
Coordinating sewing thread
·
Small sew on snaps.
GAUGE: 11 sts = 1
inch, 16 rows = 1 inch
STITCHES AND TERMS USED:
·
CO – cast on
·
K – knit
·
P – purl
S1 - slip 1
S1 - slip 1
·
Wyif – with yarn in front
·
Wyib – with yarn in back
BOWTIE BODY: CO 16
Row 1: K, s1 wyif. Repeat across. K last 2 sts.
Row 2: P, s1 wyib. Repeat across. P last 2 sts.
Repeat rows 1 & 2 until piece measures 9 inches. Bind
off and leave a long end for sewing.
Sew short ends together. Secure. Center the seam and thread
the tail through both thicknesses and pull tightly to gather. Secure. Set
aside.
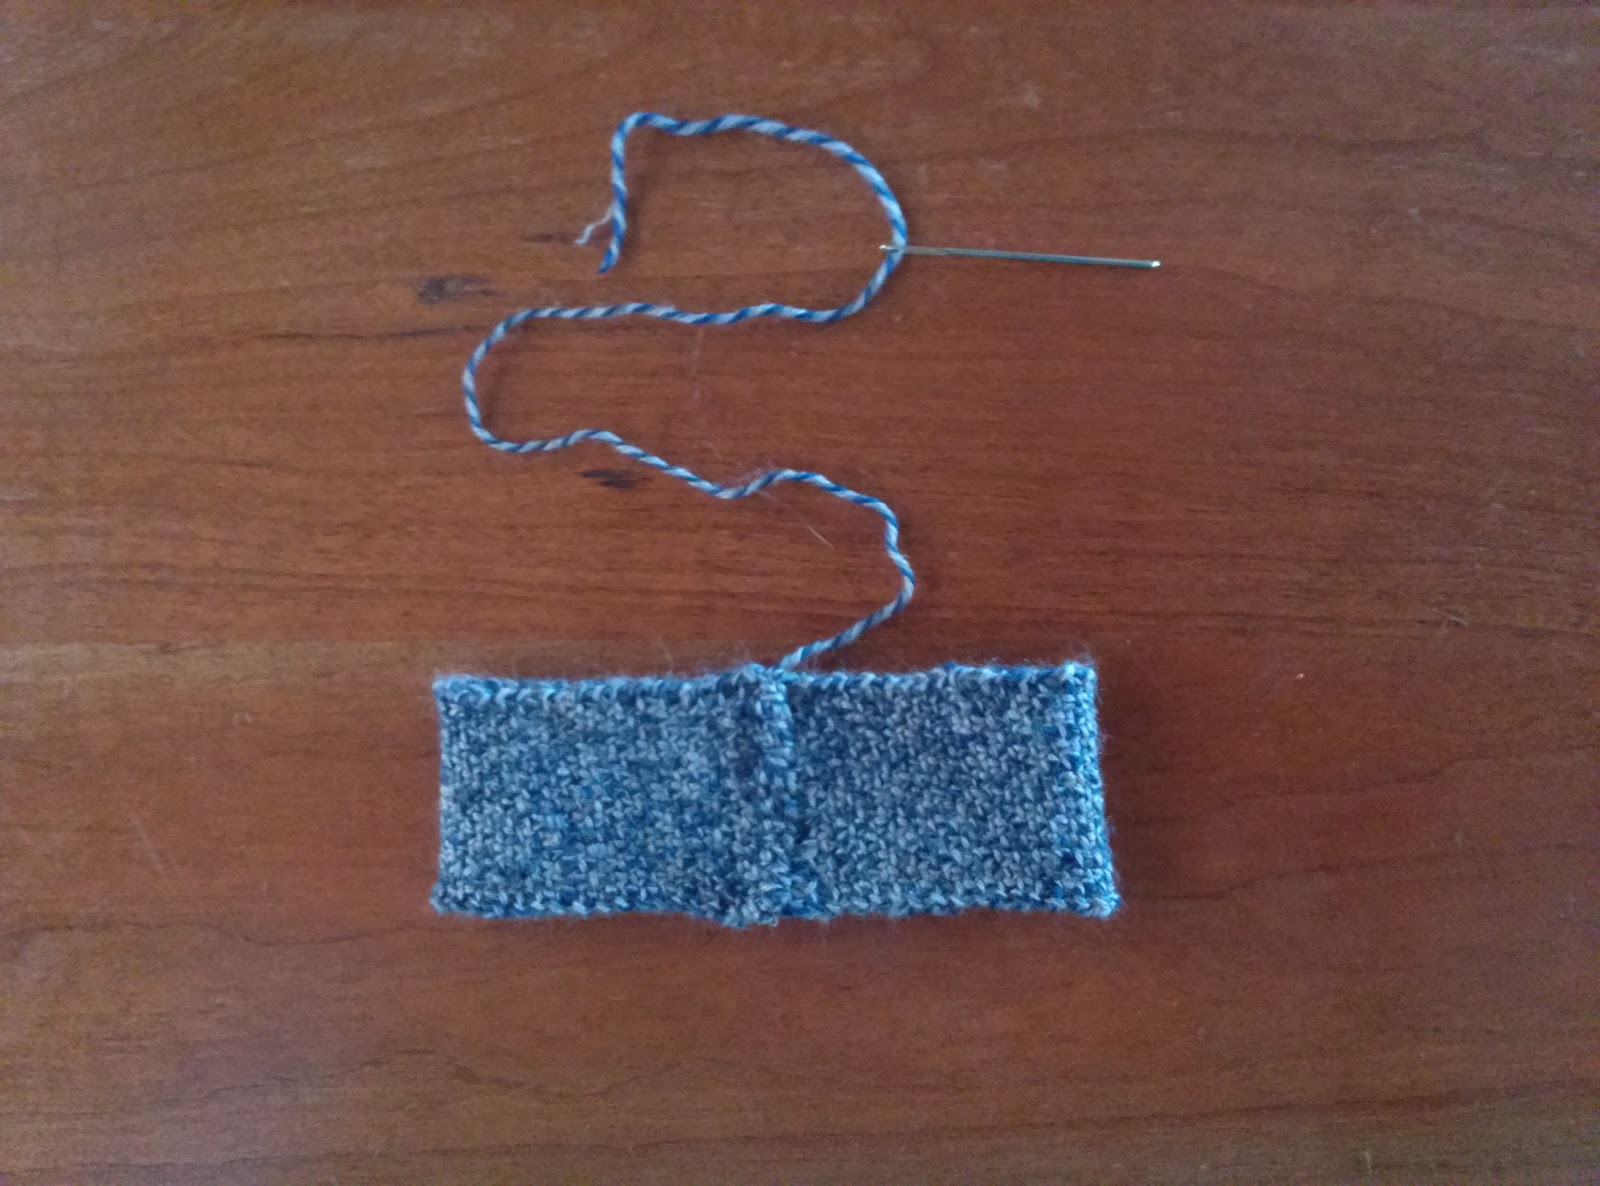 |
| Sew short ends together. Secure. Center the seam. |
 |
| On the front side, thread the tail through both thickness as shown in the picture above. |
 |
| Pull tight and secure with a knot. |
CENTER BAND: CO 10
Row 1: K, s1 wyif. Repeat across. K last 2 sts.
Row 2: P, s1 wyib. Repeat across. P last 2 sts.
Repeat rows 1 & 2 until piece measures 1 ½ inches. Bind off and leave a long end for
sewing.
Wrap around the center gathered portion of the bowtie body
and stitch seam. Secure the center band
with a few small stitches to the body at the top and bottom edges of the
bowtie, leaving the sides open so that the neck band can be passed through. See picture below Neck Band.
NECK BAND: CO 6
Row 1: (K, sl 1 wyif) twice. K last 2 sts.
Row 2: (P, sl 1 wyib) twice. P last 2 sts.
Repeat rows 1 & 2 until piece measures ½ inch longer
than neck measurement. Bind off and weave in all ends. Follow the picture tutorial below for a final assembly.
 |
| On the back side of the bowtie, slip a crochet hook under the center band and hook onto the end of the neck band. Ensure the back side of the band is facing towards you and carefully pull the neck band through the center band, centering the neck band as shown in the picture below. |
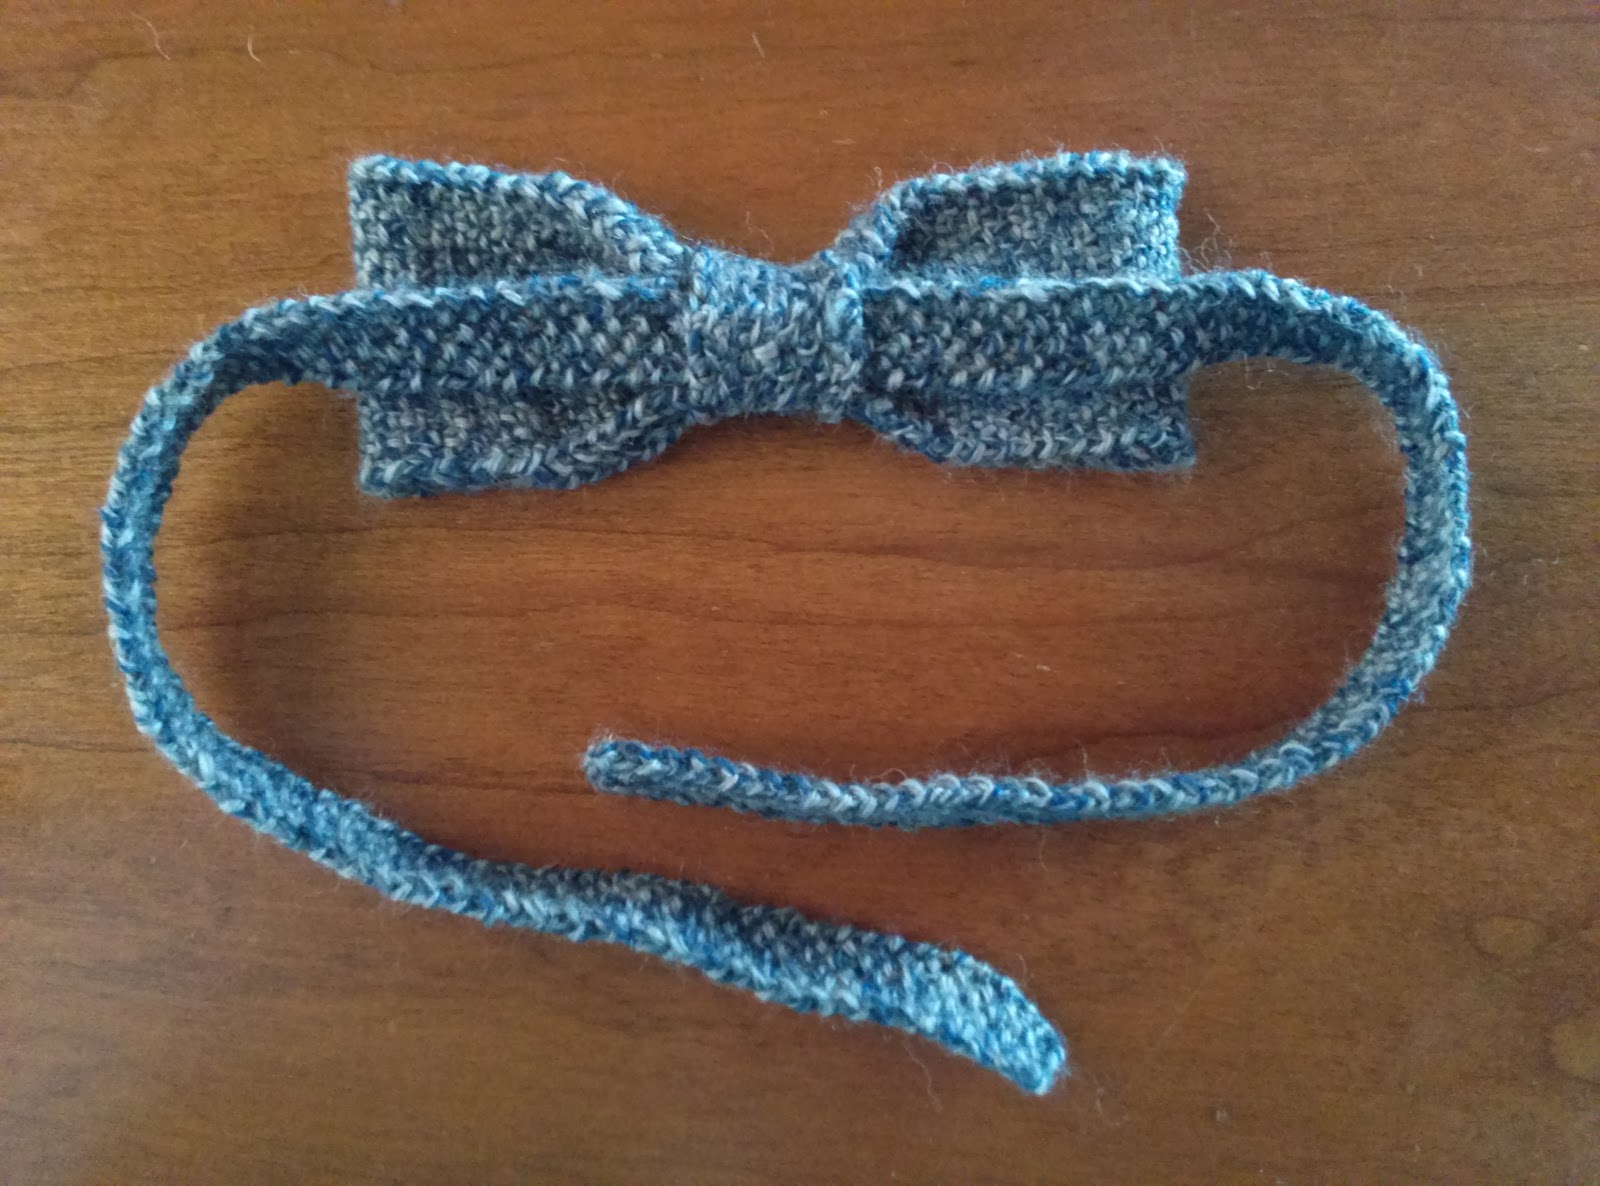 |
| This is how it will look. You may secure the neck band to the center band, but it is not necessary. It should be a snug fit and will not slide much, if any. |
 |
| Hand sew three sets of snaps spaced 1/4 inch apart to the ends of the neck band. Make sure one end is sewn to the front side and the other end is sewn to the back side. |

A lot of hard work goes into writing patterns. Please
feel free to share the link, but do not copy and distribute this pattern by any
other means.
If you like getting my FREE patterns and don't want to miss
out on any future ones, you can subscribe to my blog and have all of my new
entries delivered straight to your email inbox! Just type your email address
into the field on the right hand column under the heading "follow by
email" and click submit. Be sure to check your email and follow the
verification steps for your subscription to be complete!!
Blessings!!!
Amy B


Comments
Post a Comment